How to Add Push Notifications to a Flutter App using Firebase Cloud Messaging?
appstonelab
May 24, 2022

What are push notifications:
Push Notifications are a kind of pop-up messaging source that notifies the app users about the updates happening in the app. They also play an important role in boosting the user involvement in your app.
The main motive of app push notifications is to provide information to the user so that he gets back to the application. These notifications emerge at the top of the smartphone screen even if the app is closed. Their detailed message gives the subscriber the below options:
- Click on the message, or swipe it off the screen and view it later in the app.
Firebase Cloud Messaging is a resource provided by Firebase which lets you send these alerts to your users. You can organize various configurations to send various notifications to specific audiences based on time and regime.
Implementing Push Notifications:
For implementing push notifications, we would first need to create a Flutter project. You can follow the below steps:
1. Create a Flutter Project
1.1 Create a Flutter project following the below Flutter command:
– Flutter create pushnotification
1.2 After setting up the project, execute the following command in the terminal to run the project:
– Flutter run
After a successful build, you will get the following result in the screen:

2. Integrate Firebase Configuration with Flutter
We are going to incorporate the Firebase services with our Flutter project. But before that, we need to generate a Firebase project.
2.1 Create Firebase project
After building up & creating a simple Flutter app, move to the Firebase official website here:
2.1.1 Go to the official website and click on “Get started”.

2.1.2 After clicking on “Get started”, create a new project by tapping on the “Add project” box.
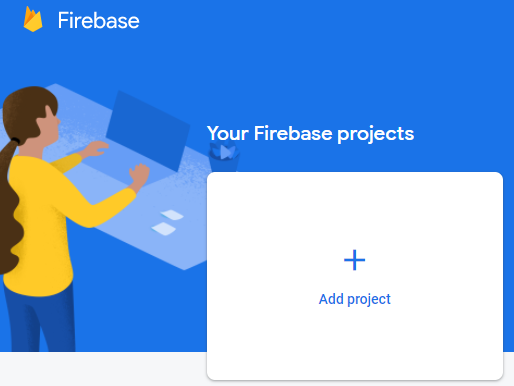
2.1.3 Click on “Add project” and follow the below step:
– Enter your project name and click on continue

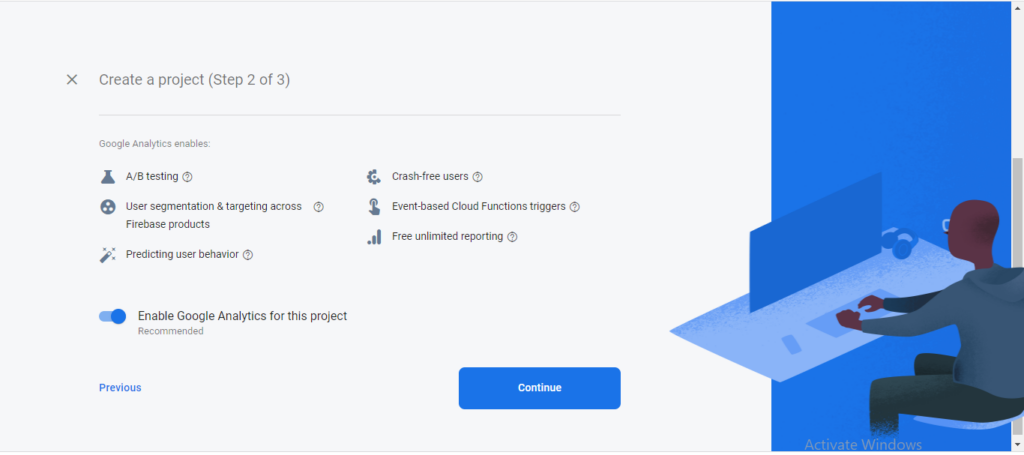
– After clicking on “Continue”, the new screen would be Google Analytics for your Firebase project and then again click on “Continue”.
Google Analytics is a free and unlimited analytics solution that enables targeting, reporting, and more in Firebase Crashlytics, Cloud Messaging, In-App Messaging, Remote Config,Testing, Predictions, and Cloud Functions.
– After clicking on “Continue”, open a new screen. And select “default Account for firebase” and click on “Create project”.
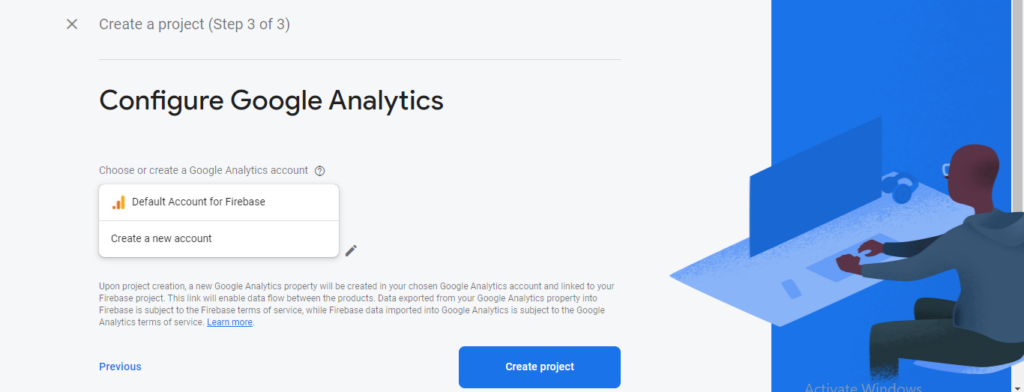
After that, the project will be created successfully. Firebase will show a prompt saying “Your new project is ready”.
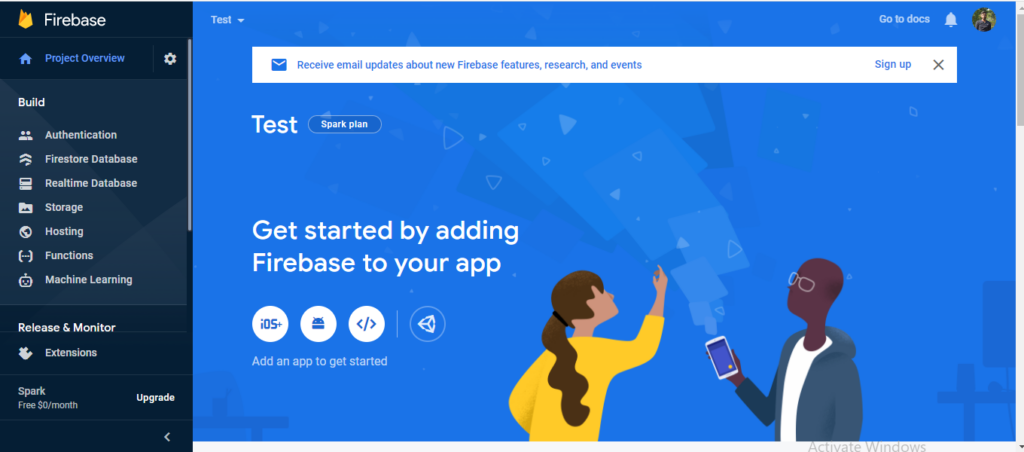
After the project is created successfully, now we need to configure your app to use Firebase.
2.2 Configure your app to use Firebase
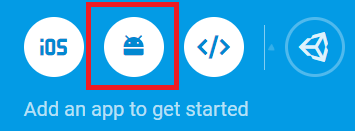
In the “Add an app to get started” column, click on the Android icon to add an Android app to Firebase.
On the succeeding screen, type in your Android package name & App nickname and hit on Register App. Your package name is usually the application ID in your app-level build.gradle file. If stated, the app nickname will be used throughout the Firebase console to illustrate this app. Nicknames aren’t available to users. And click on the “Register app”.

Initialise the google-services.json file & put it in your project’s app root index. Ensure the config file is not included with extra elements, like (2). After adding this file, click on the next button.
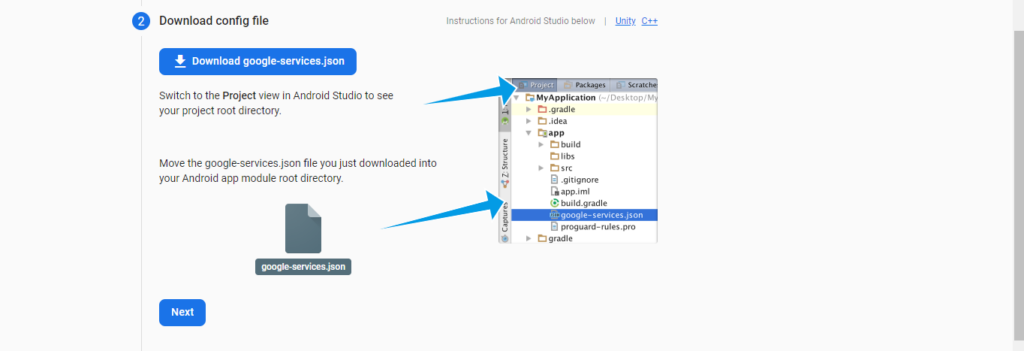
Then, add google-service.json file. The Google services plugin for Gradle shows the google-services.json file up. Change your build.gradle files to use the plugin.
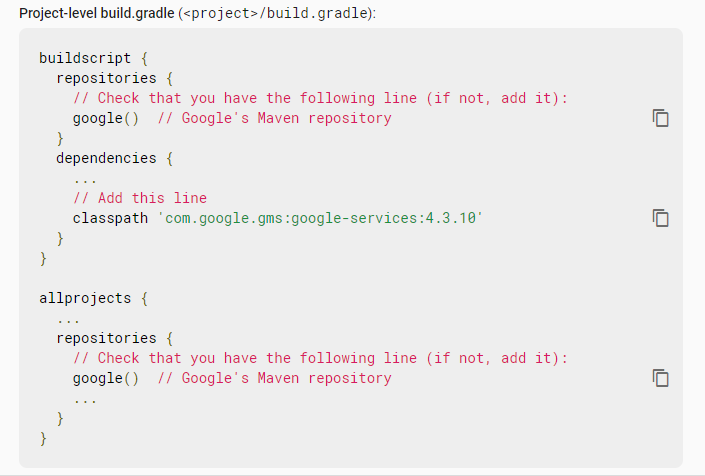
– Project-level build.gradle (<project>/build.gradle):
– App-level build.gradle (<project>/<app-module>/build.gradle):

With that we have effectively integrated Firebase configurations with our Flutter project.
3. Integrate Firebase Messaging with Flutter
So, initially, we need to add the firebase-messaging possession to the ./android/app/build.gradle file. In the file, we will have to enter the following dependencies:

Following that, we need to enter a ,measure and a classification as an intent-filter within the activity label in the ./android/app/src/main/AndroidManifest.xml file:

Now, we need to generate a Java file called Application.java in the track:
/android/app/src/main/java/<app-organisation-path>.
Then, we need to add the code from the below code extract inside it:

Now, we need to allot this Application task to the application tag of the AndroidManifest.xml file as shown in the code extract below:

This finishes our setup of the Firebase messaging plugin in the native Android code. Now, we’ll proceed to the Flutter project.
Here, we are going to apply the firebase_messaging bundle, for that, we need to enter the plugin to the dependency option of the pubspec.yaml file.
We need to add the below convention to the dependencies option:
firebase_messaging: ^7.0.3
4. Now Implement a Simple UI Screen
The messageTitle variable will get the notification message title and notificationAlert will be allotted the action that’s been finished once the notification shows up.

So we need to set up the code to get the notification and apply the notification message to show it on the screen.
For that, we need to enter the code from the below code extract in the initiState function:
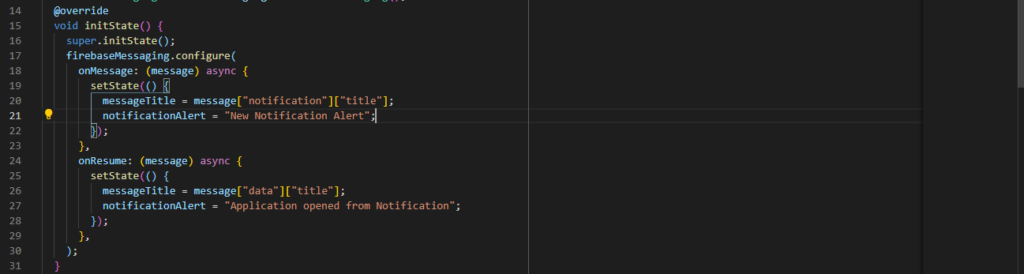
Here, we have utilised the configure procedure offered by firebase Messaging instance which in turn provides the onMessage and onResume call-backs. These call backs shares the notification message as a limitation. The message response will bear the notification item as a map item.
The onMessage task triggers when the notification is received while we are running the app. The onResume function activates when we obtain the notification alert in the device notification bar and opens the app through the push notification itself. In this instance, the app can be playing in the background or not running at all.
Now we just need to configure a message in Firebase Cloud Messaging and share it to the device.
5. Create a Message from the Firebase Cloud Messaging Console
First, we need to revert to the Cloud Messaging console in the Firebase website as displayed in the picture below:

Here, we can view the ‘Send your first message’ alternative in the window, as we have not aligned any messages earlier. We need to tap on it which will take us to the below window:

Here, we can show the headline, text, photo, and name of the alert. The headline we position here will be given as the title in the message object on the callbacks we positioned earlier in the Flutter project.
After fixing the specific columns, we can tap on ‘Next’ which will take us to the below window:
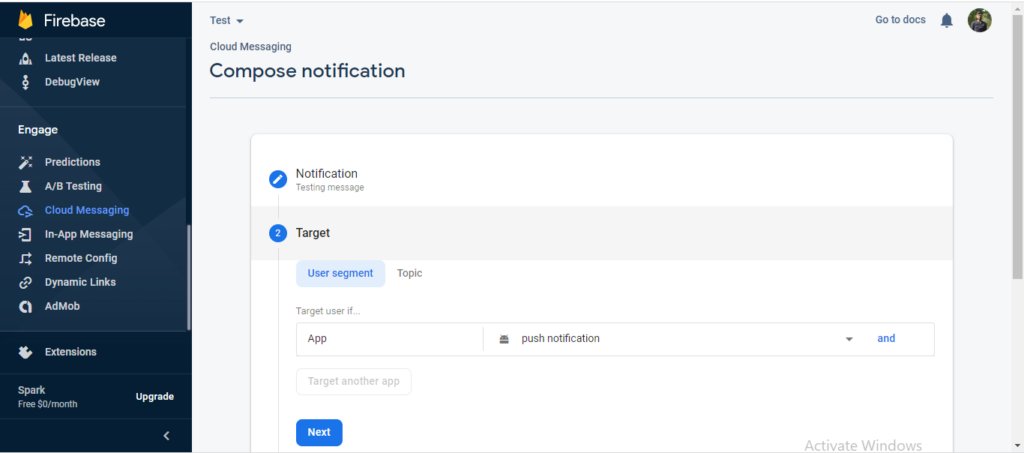
Here, we need to share our target app and click on ‘Next’.
For Scheduling we can keep the default preference:
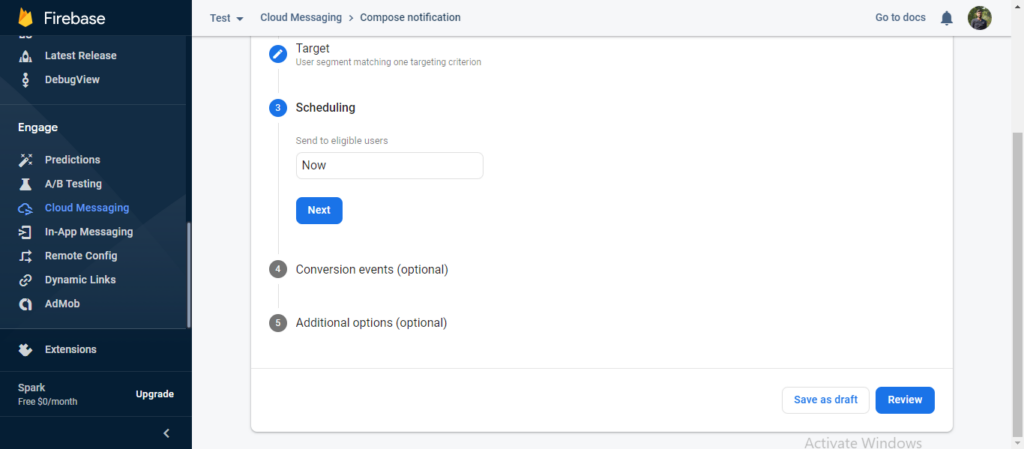
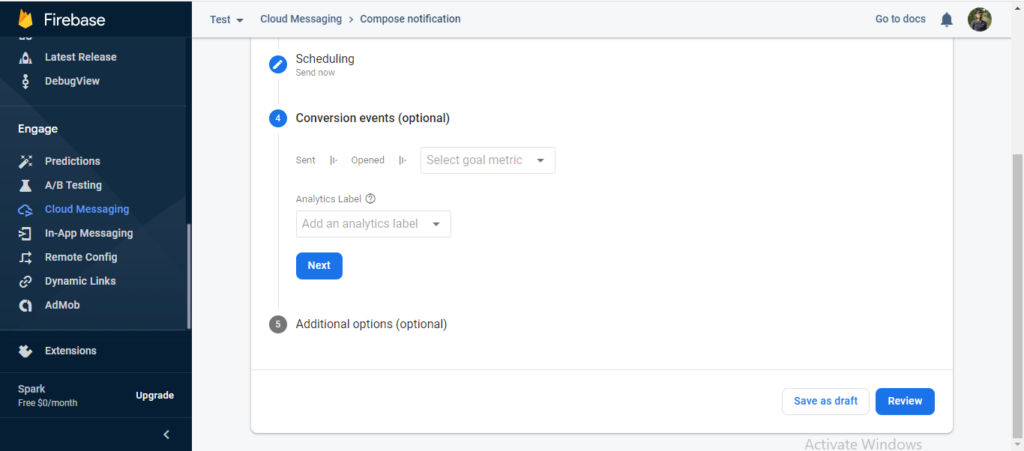
Next, the Conversion window will display which we can put as default as well, and then tap on the ‘Next’ icon.
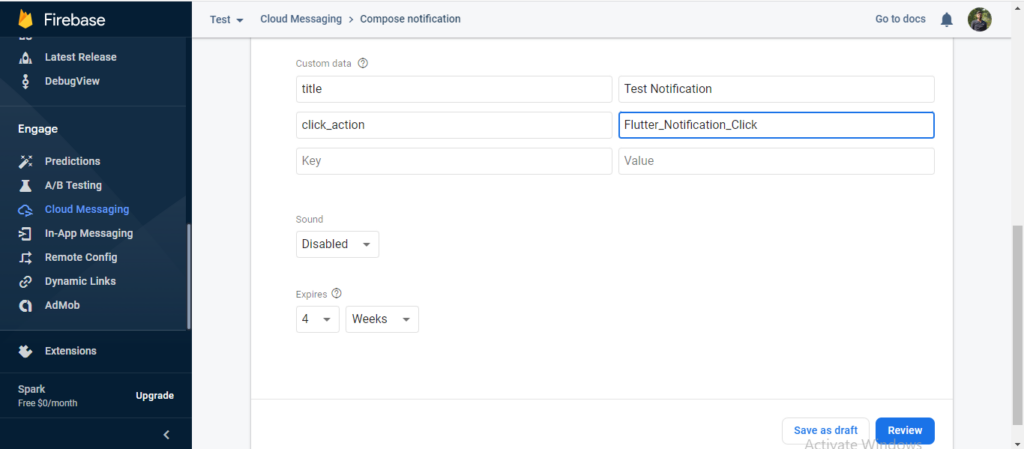
Next, a window where we need to share the custom data will show up in which we can position the title and click_action. This click action event is activated whenever we click on the alert that shows up in the notification bar of the device.
Now, we are all set to send the first notification message to the device as we tap on the ‘Review’ button and send the notification. When we click on “Review button”, it shows an alert dialog box which looks like the image below and then click on “Publish”.

When we click on the publish button we finally send push notification in our Flutter app.
The app is playing in the background. When we send the message, we get a push notification in the notification bar of the device. Then, as we draw down the notification bar, we can view the notification message title and text. And, by tapping on the notification message, we can initiate the application and show the custom data on the screen. This makes sure that our onResume call back was activated.
And we’re done! We have well added a push notification feature in our Flutter application using Firebase Cloud Messaging.
Conclusion:
Push notifications plays an important role in any mobile app. Basically, push notification is a messaging medium that alerts the app users about what’s going on in the app. In this blog, we have discussed how to implement push notifications in our Flutter project using Firebase.
Related Blogs
Web Development
appstonelab
May 24, 2022

App Development
appstonelab
May 24, 2022

SaaSWeb Development
appstonelab
May 24, 2022
?")