How To Flash Custom Rom on an Android Device
appstonelab
May 24, 2022

What Is a Custom Rom?
(Android Read Only Memory) A file consisting the feasible requirements (a system image) of an Android OS and allied apps. The “stock ROM” comes inbuilt on the phone or tablet, whereas a “custom ROM” comes from an outsider.The custom ROM is either a distinctively improved OS, such as Cyanogen, or a stock version made accessible for older devices or for new devices before the vendor launch date.
- A Custom ROM is an unauthorized rendition of the OS for the device it was made for. They usually have features and personalized options not found in the official ROM and can even be based on a higher version of Android than is officially in stock. I have a Pixel 2xl running Pie, for example.
- There are a lot of different well known Custom ROMs for Android devices, Lineage, Resurrection Remix. Omega and Darklord come to mind.
- To set up a Custom ROM, one has to have made one for your phone model. Also, your device has to have a personalized readjustment installed but does not have to be ingrained.
Why should you Use a Custom ROM?
- Execution
- BatteryLife
- Updates
- Personalisation
Flashing the ROM:
Flashing a ROM means installing the system image into the device’s internal flash memory. Flash memory retains the Android’s firmware, the same as most portable devices with an impacted OS.
You can find the best Custom ROM for your device on https://forum.xda-developers.com/
Some of the renowned Custom ROMs for Android:
1. Pixel Experience:
PixelExperience is an AOSP based ROM, with Google apps added and all Pixel goodies (launcher, wallpapers, icons, fonts, boot animation). Our aim is to provide the ultimate feasible security and firmness, along with important and useful functionalities for the proper operation of the device.
2. LineageOS:
LineageOS is an operating system for smartphones, tablet computers, and set-top boxes, based on Android with usually free and open-source software. It is the inheritor to the custom ROM CyanogenMod, from which it was branched in December 2016 when Cyanogen Inc. declared it was stopping the development and closing down the construction behind the project. Since Cyanogen Inc. held the rights to the Cyanogen name, the project reformed its fork as LineageOS.
3. EvolutionX:
Evolution X is a Flashable Custom ROM to bring an accurate Pixel quality to your Android Device at first glimpse, with many extra configurations at your conveyance. We strive to offer recurring builds with monthly stability patches from the trending AOSP authorities.
How to Install a Custom ROM on your Android mobile to refurbish?
Note: Installing a custom ROM can empty the warranty on some devices since it demands unlocking the bootloader. Continue with attention as you can generate temporary/permanent harm to your device if you don’t obey all the steps accurately.
Often, the installation guide can have some modifications based on your device. These are standard instructions. Please verify with your device forums for changes.
- To flash Any ROM you need to unlock the Bootloader first.
- When the bootloader is unlocked, install TWRP Recovery or Any personalized Recovery on your Android device.
You can find twrp recovery on https://twrp.me/
How to release Bootloader and Flash Recovery?
Step 1. Avail the developer options:
Google demands that you avail an option within Android before you can use Fastboot Mode to release your phone’s bootloader. This is done to make sure that only the device’s owner can unlock the bootloader. And to make sure you don’t fortuitously do it, they’ve disguised the setting in a menu you have to unlock.
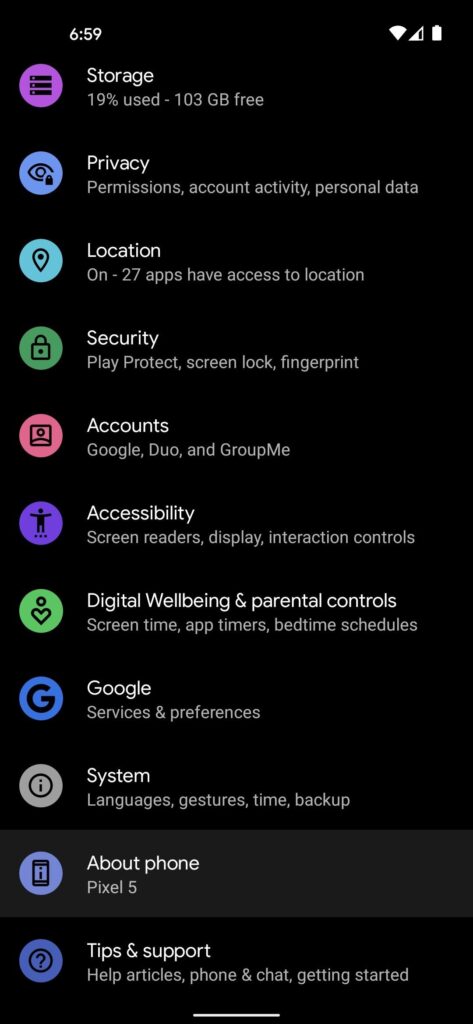
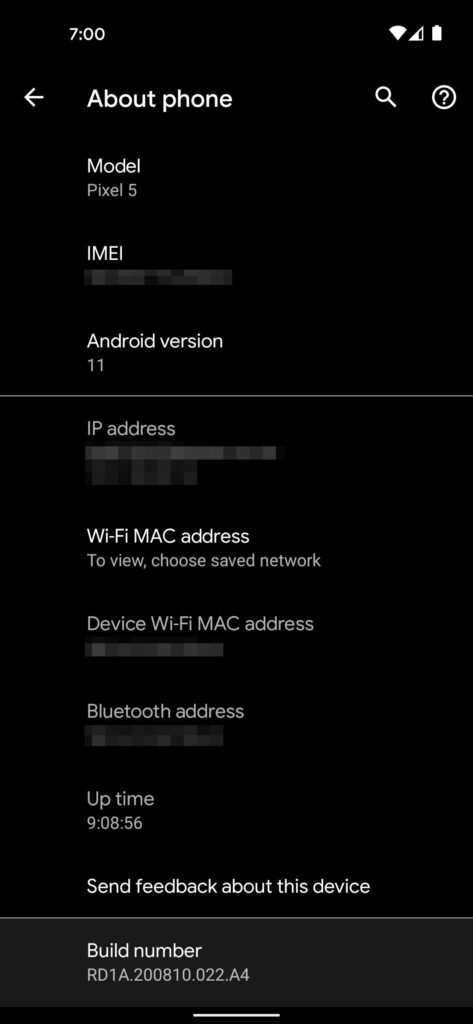
Open the Settings app on your Pixel 5 and scroll down to choose “About phone.” There, scroll down again and tap “Build number” seven times in rapid succession. You’ll be asked to enter your lock screen PIN, and once you do, you’ll see a message stating “You are now a developer!”


Step 2. Avail OEM Unlocking
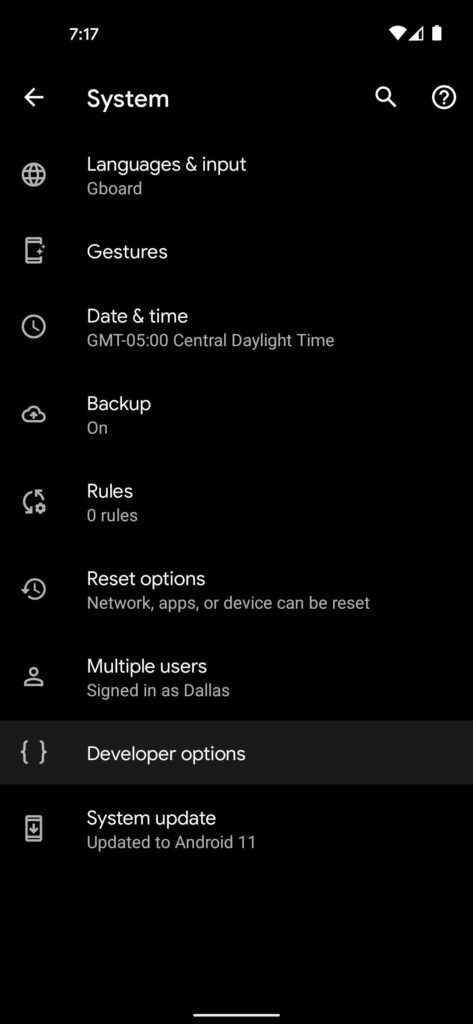
Now, go back to the main Setting screen and choose “System,” then tap “Advanced.” Here, you’ll find the newly-released “Developer options” — proceed and select this entry to open the menu.
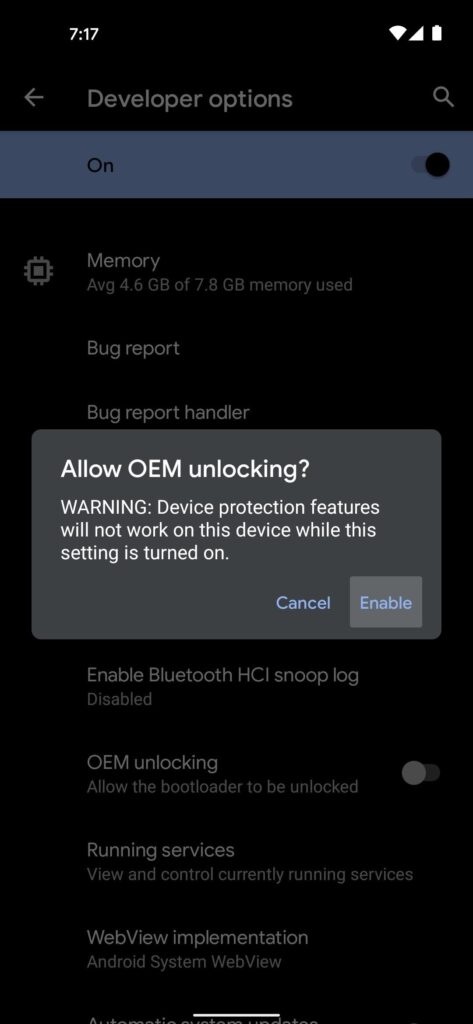
Facing the top of the next screen, avail the preceding option to “OEM unlocking,” then add your lock screen PIN or passcode and click on “Enable” on the popup. To clarify, your bootloader isn’t released yet — you’ve just permitted it to be unlocked.


Step 3. Enter into Fastboot Mode
Now, reboot your phone. When the “Restarting” animation vanishes and the screen goes blank, tap and hold the volume down button. Keep holding this button until your device converts into fastboot stage.
Step 4. Install Google’s Platform-Tools on Your Computer
In order to share the Fastboot Commands, you’ll require to install a small bit of software on your computer. It’s Google’s “platform-tools,” aka ADB and Fastboot, which you can install right from the below:
- Install Google’s Platform-technologies: Windows | Mac | Linux
Step 5. Draw out the ZIP
Once installed, draw out the ZIP and you’ll find a folder named “platform-tools” — transfer this folder to your desktop.
Step 6. Open a Command screen in the Platform-Tools Folder
Now, you’ll be required to open a command window on your computer. If you’re on Mac or Linux, open the Terminal app. If you’re on Windows, open your Start menu and type “cmd” while it’s open, then click on enter.
In the command prompt, type cd subsequently by a space, but don’t click on enter yet. Rather, take the platform-tools folder from your desktop and drop it above the command window. This will generate the folder’s full track, so when it reads “cd C:\Users\Name\Desktop,” you can proceed to hitting Enter.
Step 7. Release the Bootloader.
Now, with your phone still in Fastboot Mode, associate it to your computer with a USB data cable. Enter the following into the command prompt on your computer, then press enter:
Command :- fastboot flashing unlock
If you see a “Command not found” error, resend the same command, but with a full-stop and a slash at the start:
Command :- ./fastboot flashing unlock
At this stage, your phone should vary from the ordinary Fastboot Mode screen to one enquiring if you’d like to release the bootloader. Press the volume down button once to headline the “Unlock the bootloader” option, then press the power button to choose it.
Step 8. Install TWRP Recovery for your Android Device
Now find your device’s TWRP Recovery file. The official builds have been presented on TWRP official site. On the contrary, if your device isn’t on that list, then you may also install the unauthorised builds from XDA. Whilst some devices have both the TWRP IMG and ZIP files, others only have the TWRP IMG file. The cause for the same will be clarified later on in this guide. For now, you just have to download the accessible TWRP file/files for your device.
Step 9A. Install TWRP on an A-only Android Device
In these range of devices, you still have the recovery sub-division, therefore you could flash the TWRP IMG file to the recovery partition. Furthermore, for these devices, only the TWRP IMG file will be accessible since they don’t need a ZIP Installer. Having said that, ensure to rename the installed recovery to twrp, hence the complete name becomes twrp.img.
Now share this twrp.img file to the platform-tools folder. Similarly, re-confirm that the CMD window is still opened inside this platform-tools directory, if that is not the case then do so immediately (by typing CMD in its address bar).
- With your device associated to PC via USB cable and booted to Fastboot, implement the below command in the CMD window to install TWRP Recovery on your A-only Android device.
Command :- fastboot flash recovery twrp.img
- Finally, use the following command to boot your device to the OS:
Command :- fastboot reboot
Step 9B. Instate TWRP on A/B Android Device
If you have reached this section, then your device is an A/B sub-division, hence it doesn’t have the recovery partition. Thus, we can not straightforward flash TWRP to the recovery partition. As things are administered by the boot partition, we will first prepare your device to the TWRP via its IMG file and then permanently flash it via its ZIP file. Moreover, as you might have observed by now, these devices have both the TWRP ZIP and IMG files. So ensure to download both the alternatives (.zip and .img).
If your A/B device has only the TWRP IMG file but no TWRP ZIP, then move to the “A/B Device but if you don’t have the TWRP ZIP file? Check out the resolution at the end of this blog.
Once installed, rename both the files to twrp, hence the complete file name would be twrp.zip and twrp.img. Now move the twrp.zip file to your device while transferring the twrp.img file to the platform-tools folder on your PC. Similarly, re confirm that the CMD window is still opened inside this platform-tools directory, if that is not the case then do so immediately (by typing CMD in its address bar).
Now with your device associated to PC via USB cable and booted to Fastboot, implement the below command in the CMD window to ‘boot’ your device to the TWRP Recovery.
Command :- fastboot boot twrp.img
On the contrary, if you are plotting to ‘flash’ the TWRP Recovery to the boot partition, then use the below command:
Command :- fastboot flash boot twrp.img
Once booted to TWRP, go to its Install section. Then scroll through the twrp.zip file, choose it and perform a right swipe to flash it. If your TWRP doesn’t have the ZIP file, and only comes with the IMG file, then you would need to flash this IMG file to the Ramdisk partition. Directions for the same are given at the end of this guide, refer to “How to Install TWRP without ZIP File”.
How to Install a Custom ROM?
Now that you have everything on the plate to install a custom ROM, we can begin with the process.
Step 1: Backup your data
Make sure to make a backup of all your data before starting.
Step 2: Downloading the correct ROM
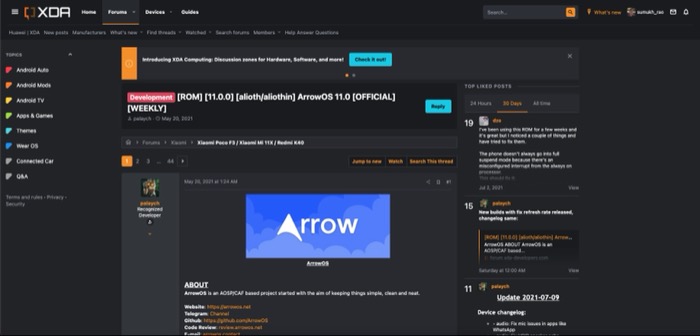
As mentioned earlier, the best way to do this is to go to the XDA Forums for your device and look for a ROM that best meets your needs. Custom ROMs are device-specific so install a ROM that’s made explicitly for your device. Also, there can be various forms of the same device based on carrier, region, etc. so be aware of this too. Spot the apt custom ROM for your accurate device. If you’re unsure, ask about compatibility in the XDA Forums.
Once you’ve got the ROM you want to install, download the zip file either on your computer or on your phone. Note that you will be required to wipe your phone in some of the later steps, so it is suggested to do the file transfer later on, after the data wipe — but ensure that your phone can connect to your computer and can get the files. Following that, you will be required to replicate the ROM file to the root of your phone’s internal storage. Don’t take the zip file out.

Step 3: Installing GApps or Google Apps

Custom ROMs do not come with Google’s apps and services pre-installed. So if you want to be able to sign in with your Google account and use Google’s services like Sync, Play Store, Gmail, Drive, etc., you’ll need to install a distinct GApps package. There are a lot of alternatives of GApps you can download.
Step 4: Booting into TWRP
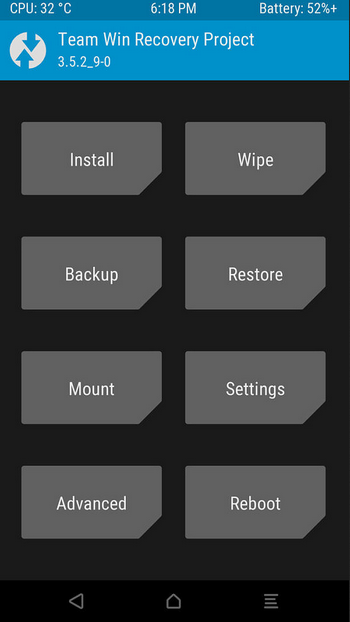

Once you’ve replicated the ROM and GApps files to your phone’s internal memory, it’s time to boot into TWRP to flash the files.
Step 5: Installing the Custom ROM
Once you’re in TWRP, it’s a good thought to take an Android backup of your whole system before moving ahead. This can be beneficial in case you end up with a failed installation. You’ll be able to boot into TWRP and reinstate the backup to revert to the earlier state of your device.
- To do this, choose the Backup button in TWRP and click on Boot, System Image, Data, Modem, and EFS, and then Swipe to backup. Stand by until it’s finished.


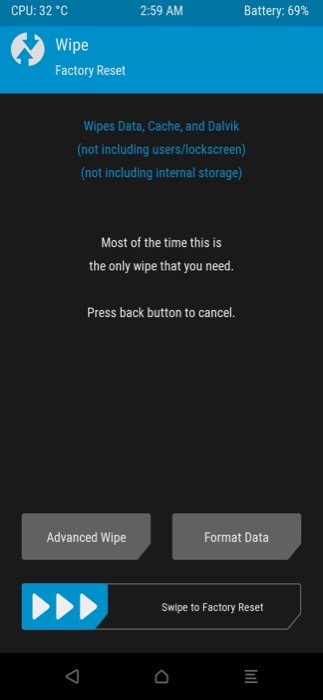
This step will clean your complete phone:
Go back to the main menu of TWRP and choose Wipe. Then, Swipe to Factory Reset. Press the Format Data option and type in ‘yes’ and select the tick mark to configure your phone. Make sure that formatting the /data partition will need you to reboot once so that TWRP can properly recognize the freshly created file system.

- Furthermore, since the internal memory of the device is cleaned during configuration, you must replicate the ROM and GApps files once again to your phone’s storage.
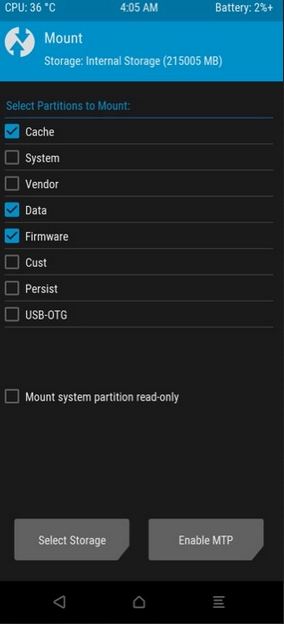
- You can do this from within TWRP itself. Move over to the Mount section and select the Enable MTP option.
- Now, associate your phone to your PC and it should be identified as a storage device. Transfer the ROM.

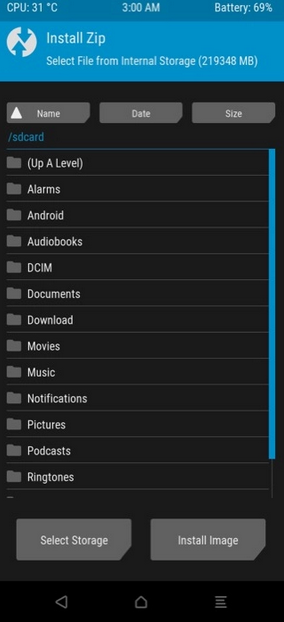
- Once completed, revert to the main menu on TWRP and select Install. Scan to the location where you retained the ROM and GApps files. First, choose the ROM and Swipe to Install it.
- Get back to the previous menu and select the GApps file. Install that as well. Once the installation is done, select Reboot to System.
- If your configuration does not boot with this sequence of steps, you may need to flash/install the ROM, reboot back into recovery, and then flash the GApps file. This additional reboot is needed in some cases.

You now have a custom Android ROM installed on your phone! Wait for your phone to boot up. It may take sometime for the initial boot procedure so don’t freak out, your phone will boot into the setup process.
Conclusion: That’s how you can install a custom Android ROM on your phone. It’s a relatively smooth procedure and with less time and patience, you can rejoice a new ROM on your phone with additional functionalities, personalization, theming, and more. If you installed a custom ROM and you don’t like it or it has bugs, just download a new ROM and redo the installation process.
Related Blogs
App DevelopmentSaaSUX DesignWeb Development
appstonelab
May 24, 2022

Web Development
appstonelab
May 24, 2022

App DevelopmentSaaS
appstonelab
May 24, 2022
